Go to the campaign in your customer account.
1. Click on the ‘Create new‘ button as follows.

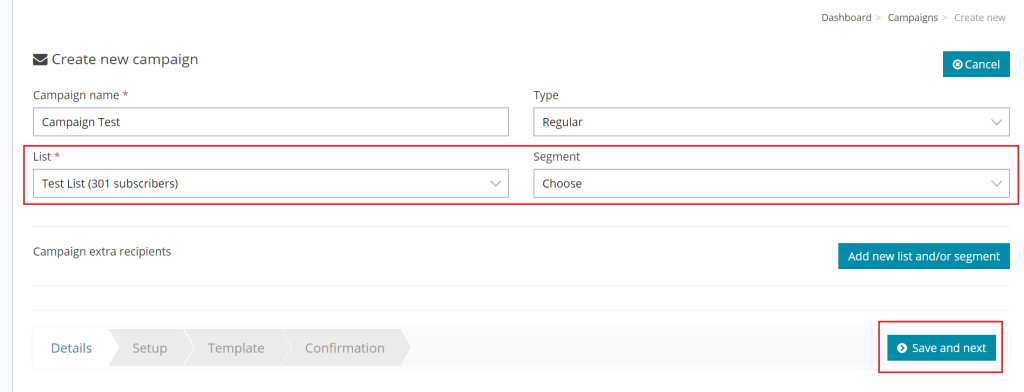
2. Give the ‘Campaign Name’ and select your already created ‘Contact list’
(you can select the ‘Segment’ as well if you want to send only to a specific segment and not the whole list).
Click on ‘Save and Next’.
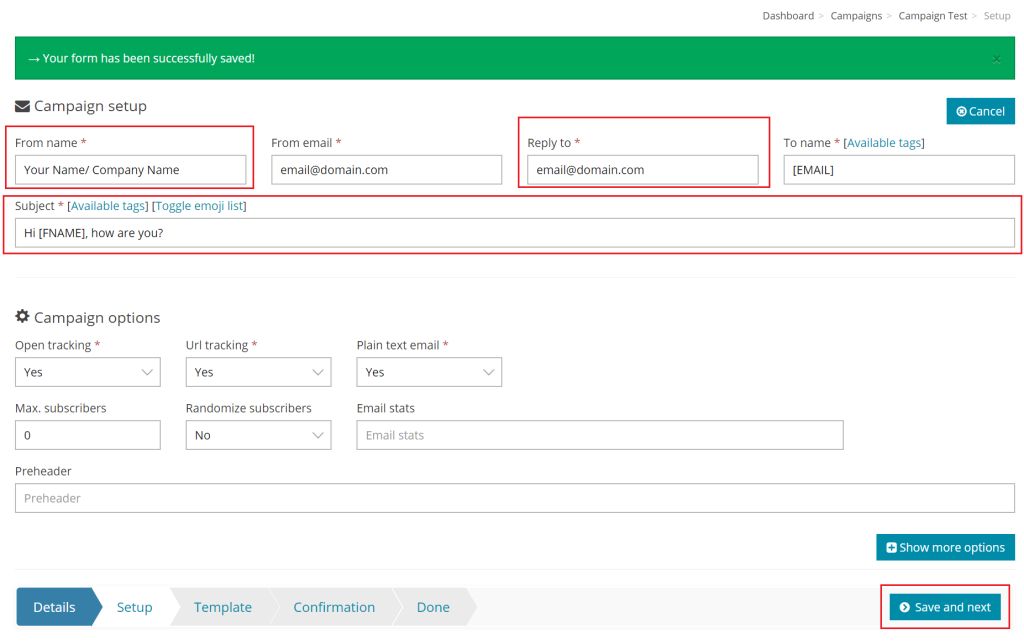
3. You can change the ‘From Name’ or ‘Reply-to Email‘ as per your choice.
Give ”Subject line’ for your email campaign and leave other options as it is for system use.
Click on ‘Save and Next’.
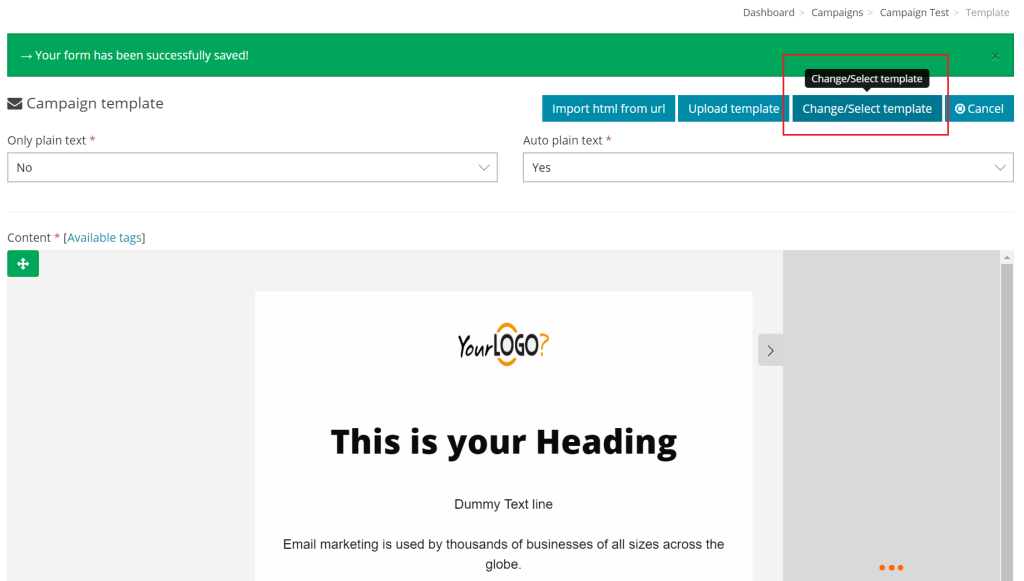
4. You can create a new template directly from here if you already have a created one in your save template area then select that template with ‘Change/Select Template’ option as follows.
‘Choose’ your required template as follows.
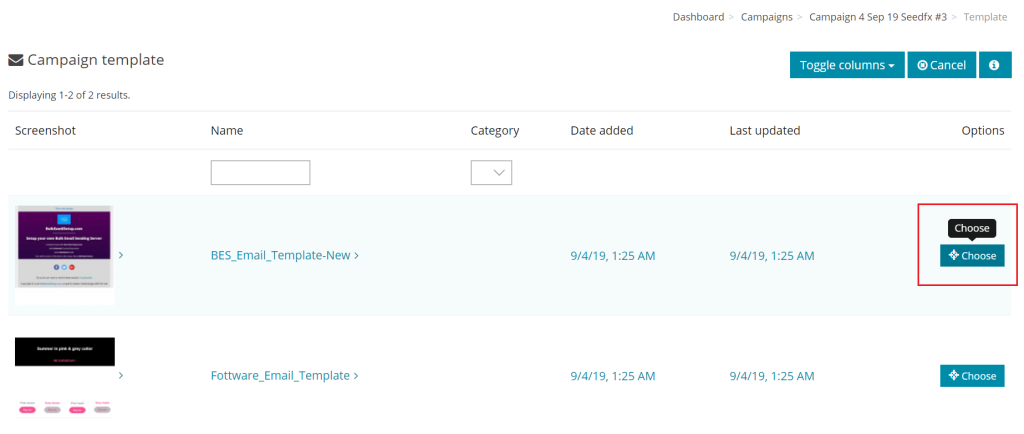
Click on ‘Save and Next’ button
5. You can schedule your email campaign with ‘Send At‘ button (Use the calendar to select the date and time) if you want to send the email at any future date/time.
Kindly Note: Please change your timezone first from your account to make sure the time at ‘Send At‘ will match with your local timezone.
If you want to send the email campaign right now then leave the existing details as it is.
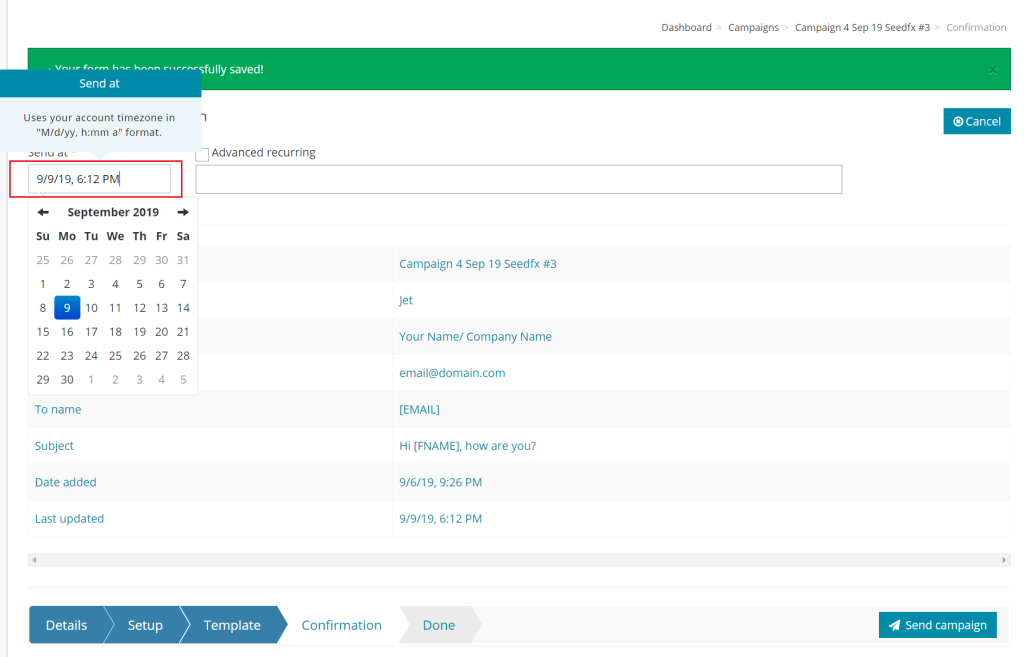
Click on ‘Send Campaign’ button.
